

GWR 9581 (Formerly 5043) Wheelchair and Buffet Progress 2019 July - December.

This site and all content is copyright of the LNER (SVR) Coach Fund and the Severn Valley Railway Charitable Trust Ltd.
All rights reserved
Progress Update 14th August 2019.
Its probably fair to say that the roof repair was not aided by the weather which
alternated between monsoon
style rain and unbearable heat. However by 10th July genuine
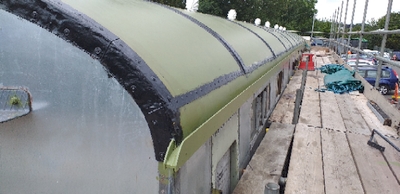
progress had been made, see Pic 1. By this
date the new lower roof sides had been
welded together into a pair of 60 ft long strips and riveted to the
original roof.
The "Lap Strips", which go across the roof and cover the panel joins were also riveted
in place
and the "But Strips" which on 9581 actually hold the roof onto the carlines
had been screwed into position.
This latter job was our introduction to the job of
drilling and tapping threads to enable 6 mm stainless steel
screws to be inserted
and screwed down tight to make the joint. Pic 2 shews how temporary flashing was
used
to seal the ends to make them watertight.
Early August came, and the gutters had been fixed in place, see Pic 3. This was a
mammoth task involving
members of both the LNER Group and the 2857 Society. About
250 holes had to be drilled and tapped to
fix the two layers of the rectangular section
gutters and the front plates accurately in position. All then had to
come off for
sealant to be added to the joints before all was re fixed tightly into position using
an impact
screwdriver. It should be explained that on 9581 the gutters are also used
to firmly hold the edges of the roof
in position. The roof vents can also be glimpsed,
attaching 16 of these was a not inconsiderable job which
involved accurate positioning,
cutting a 4" hole in the roof before attaching firstly a galvanised steel ring, and
then
the shell vent, with sealant in each joint. Pic 4 shews the rubber sealent painted
over the roof joints,
together with another close up of the gutter and also the shell
vents.
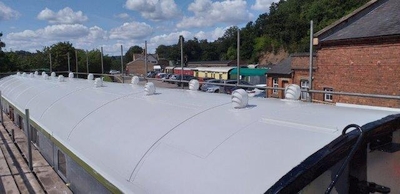
The remaining two pictures shew the difference a week and a couple of coats of paint
can make to 10 weeks
of toil. In Pic 5 it looks finished, although at least 2 more
coats of white paint, and further "Leak Finding and
Fixing" are required. Pic 6 is
from the other end and emphasises the tops of characteristic curved handrails
fitted
from the end capping and down to waist level.
The scaffolding will remain in place for a few weeks more to allow any remaining
leaks to be dealt with, and
the required extra paint to be applied-then its back to
the doors!
Richard G 14/8/2019
3. Gutters.
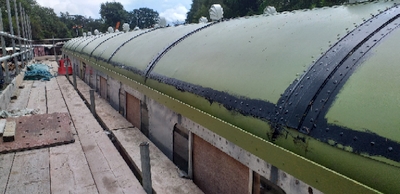
4. rubber sealant, gutters and vents.
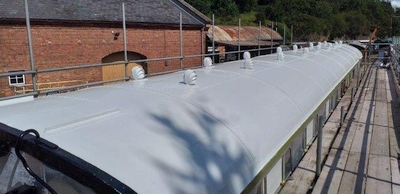
5. With 2 coats of white paint.
6. With the distinctive curved grab handles.
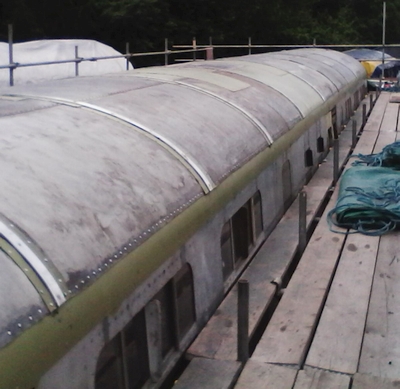
1. But strips and lower sides.
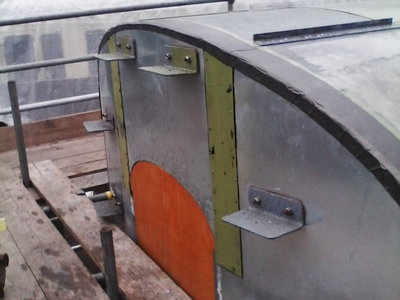
2. Temporary flashing.
Progress Update 1st September 2019.
With unexpectedly good weather the final coat
of white paint was applied to the roof and gutters on Tuesday
20th August (Photo
1). Heavy rain during in the previous week had shewn the roof to be leak free (for
the
time being at least), so a decision was taken to ask our contractor if they could
take the scaffolding down
before the Bus Rally due to be held at Bewdley on 1st September.
This would be good because our
scaffolding encroached on a corner of the area needed
for the Rally. Fortunately, despite the very short
notice Pedmore Scaffolding was
able to oblige and the site was cleared within 2 days. Photos 2 & 3 shew
the first
clear view we had of 9581.
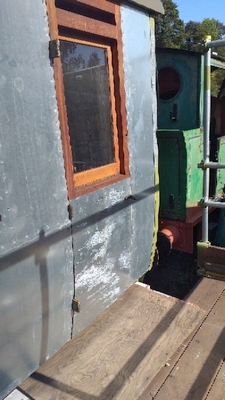
Advantage was taken of the clear site to fit another new external door, this time
to the North East corner,
during the following week, taking the total fitted to five
(photo 4).
Meanwhile inside, a start was made on producing the ceiling supports. Many curved
sections will be needed,
made by laminating layers of birch plywood in a former, whilst
the straight ones are being made from good
quality redwood. Several have already been
made and some fixed to the inside of the roof, which is being
painted, Mk 1 style,
with black bitumastic paint. In all, this will be a time consuming job which will
end,
hopefully sometime next year with the installation of the wiring, walls and ceilings.
RG 31st Aug 19
1. Final clean before painting.
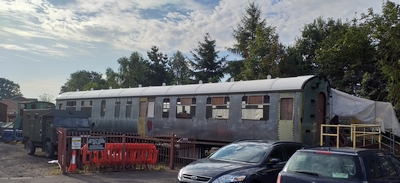
2. The first clear view of 9581 24th Aug. 19
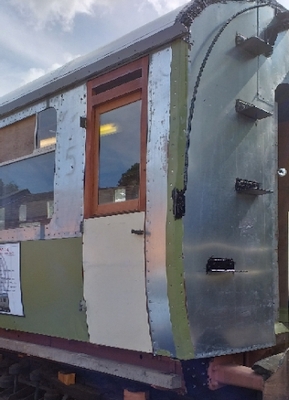
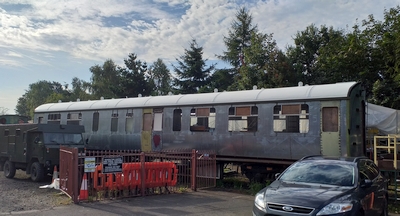
Photo 3. Another one. 24th Aug 19.
4. The latest new door 31st Aug 19
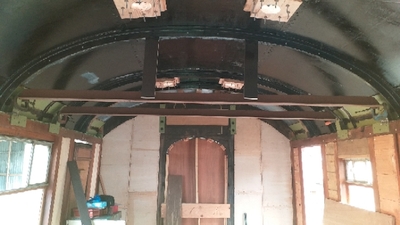
3. Tank supports
Progress Update 22nd September 2019.
In the month since the scaffolding was taken down work has proceeded on several fronts,
The inside of the
roof and ceiling supports, the supports for both water tanks which
live under the roof, the exterior doors, the
sliding shutters (they're the small windows
that slide horizontally to open), and the catches to secure the front
covers onto
the battery boxes.
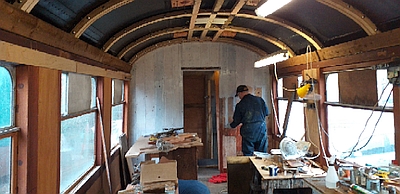
Photo 1) shews Graham applying protective paint to the inside of the roof. This copies
Mk1 practice and
coats of black bitumen will be applied to reduce corrosion and perhaps
condensation, both ongoing problems
with steel roofs.
Photo 2) is a general view of the roof over the future Bar area. The horizontal steel
beams in the background
will support a smallish water tank to supply the kitchen (drinking
water via a purifyer) and the wooden hoops
are some of the ones that have been laminated
from birch plywood and bolted to the steel carlines. They will
eventually support
the ceilings, lamp fittings and ventilators.
Photo 3) is a clearer view of the horizontal steel beams that form the tank supports.
Much work is still needed
here before they can support a water tank. The wooden square
blocks have a 4" hole in the middle and live
beneath the "shell" vents supporting
both the ceiling and the decorative interior ventilator covers.
Photo 4) Shews the future kitchen door. The lower galvanised steel panel has recently
been trimmed and put
in place, and will shortly be permanently attached once the pressed
steel top panels, that surround the
droplight, are to hand.
Photo 5) shews some original GWR fittings! They're garnish rails that fit horizontally
inside the doors at waist
level, the imprint is of the stud that holds the droplight
strap in the part open position. Colin is undertaking the
intricate process of making
up eight full sets of door interiors, refurbishing original fittings where available,
otherwise
making them from new.
Photo 6) shews an almost complete securing clip for the battery box covers. Whilst
simple in concept and
use, eight of these are required. Mike is in process of making
them
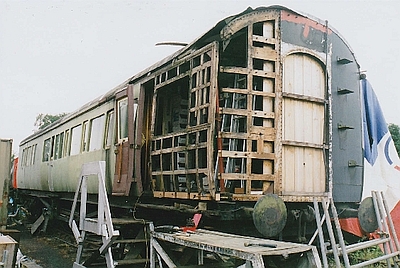
It may be recalled that 9581 is being rebuilt from GWR 3rd 5043, that had a 32 year
life as a passenger
carriage and was then much rebuilt before spending nearly 60 years
as a messroom and workshop. Its
former owners at the SVR, The 2857 Society put much
time and effort into repairing and maintaining 5043
during their period of ownership
and their members are now making a large and much appreciated
contribution to the
creation of 9581. 2857 Society stalwart Simon Marshall has found some of his photos
recalling
their own successful efforts to prolong the life of 5043. Two interesting views,
taken in 2004 are
reproduced below.
Photo 7) Is a very good view of the wooden framework, with repairs in progress. New
facing to the
bottomside can be seen, made necessary because rusty bolts had split
the old one, a frequently
encountered problem in elderly wooden carriages.
Photo 8) Shews Geoff Attwood replacing a corner post. He replaced both posts at this
end. Rotten corner
posts are another common problem.
Many more areas of the side and end framework had to be repaired or replaced at this
time. The repairs were
of good quality and skillfully executed. Thankfully in 2018
both of Goff's corner posts and most of the end
framing were found still in sufficiently
good condition for further service within 9581.
RG 22nd September 2019
6. A complete battery box cover clip
7. 2004-06-06, Coach 5043
S. Marshall
4. Galvanised steel lower panel on side door
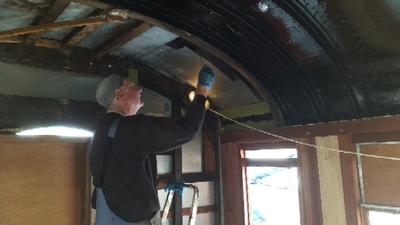
1. Graham applying black bitumen to the inside of the roof
2. Roof interior
5. Garnish rails being refurbished
8. 2004-06-06, Geoff Attwood with new corner post for Coach 5043
S. Marshall
Progress Update December 2019
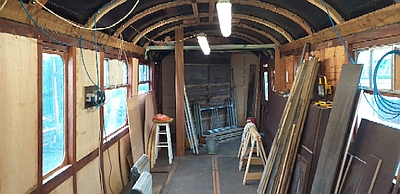
Since our last update in September, steady progress has been made on several fronts.
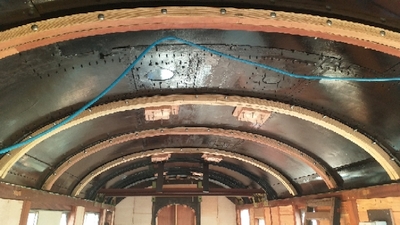
1) In the roof space, 40 laminated plywood hoops that we made earlier were bolted to the steel carlines. To these were added three rows of longitudinal battens, 16 wooden blocks beneath the roof vents, and three sets of planks at the sites of three of the future lamp fittings. In due course this wood will support the plywood ceiling, decorative vent covers and ceiling lamps. Some of this is visible in Photo 1) below.
2) Saloon outer end Bulkhead. This is the main subject of Photo 1) It was made at almost zero cost from good quality 90 year old tongue and groove planks (T&G) recovered from the old 5043, in this case, appropriately, from the best bits of the old bulkheads. GWR bulkheads are made from two layers of T&G, one with planks vertical, the other horizontal and screwed together, not surprisingly, with woodscrews. We used stainless steel ones for this job, left over from fitting the exterior steel panels. Finally Bill, one of our painters stripped off the many layers of old paint and applied primer and undercoat. None of this will be seen in the finished carriage, it will be hidden beneath an authentic GWR style of decoration (style yet to be decided).
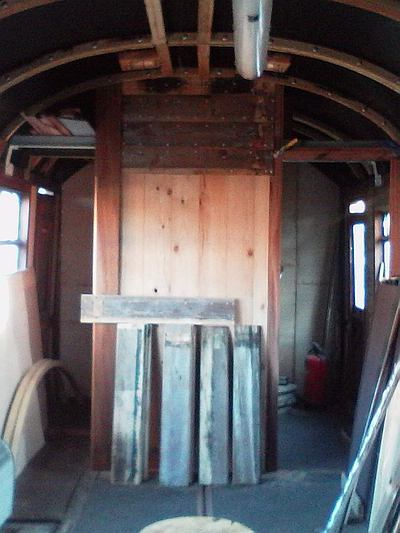
3) Starting from the Bar end, the floor is being replaced in sections. 5043 was originally built as an 8 compartment corridor 3rd, with a joist supporting each bulkhead and T&G floorboards in the compartments between. Whilst this floor was perfectly sound, the very different layout of 9581 will need joists in other places! Several new joists have been installed to support the relocated bulkheads and a start made on fitting a new floor made from 2 layers of 18 mm “Buffalo Board” (a very high quality, and expensive grade of plywood). Photo 2) shews this work in progress, with 3 new sections of Buffalo Board floor whilst that nearest the camera is the original T&G. New joists to take the kitchen bulkheads can just be seen as lighter “streaks” across the floor.
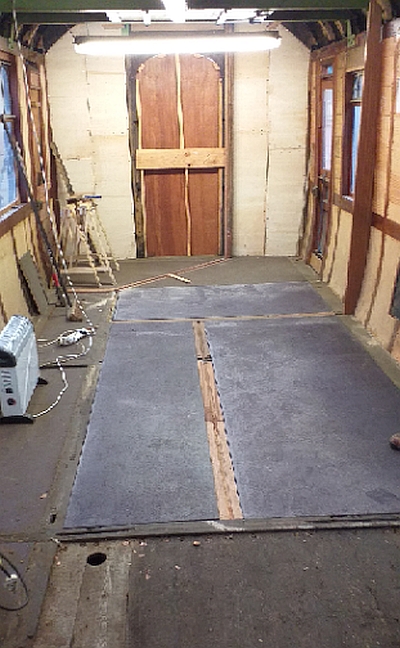
4) Photos 3) and 4) shew the new kitchen under construction. Photo 3) is rather distant and cluttered but the first bulkhead is visible in the background. Photo 4. shews the bulkhead between the bar and kitchen under construction and clearly illustrates the GWR 2-layer construction. The lighter coloured vertical T&G are new, but the short horizontals are reclaimed from the “old” 5043; - they are some of the original floorboards which, after a good clean, proved to be perfectly serviceable and the right size for bulkheads. The planks leaning against the wall are those for the lower section of this wall, and waiting to be fitted. The front edge of the bar will fit in the longitudinal channel that can be seen nearest the camera.
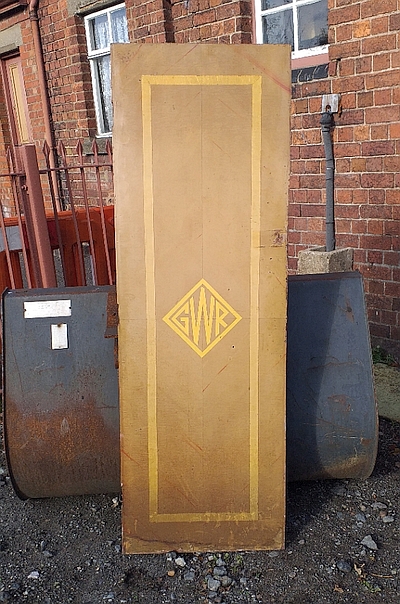
5) Photo 5) shews a rather interesting door, also reclaimed from 5043. It was made of plywood for use in its departmental career and later was expertly scumble grained to represent quartered oak veneer by a member of the 2857 Society who also applied the lining and the rather interesting GWR insignia. The LNER Group felt it a shame to lose such a work of art, and found that, were it to be framed in hardwood, it would make a very good sliding door between kitchen and bar. It’s intended to fit it in the opening to the right of Photo 4)
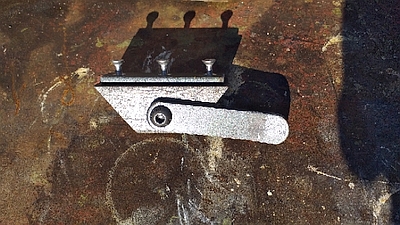
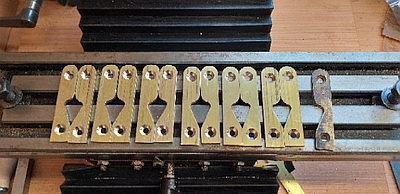
6) Photo 6) shews some often overlooked components. These were made recently to the original design by an LNER Group member and will be used to protect each of the external doors from wear that would otherwise be caused by the metal flap at the bottom of the droplight.
7) Not photographed but making good progress is the manufacture of eight sets of very intricate interior components for the doors. The restoration of the sliding shutters (small opening windows) is also progressing well; they are now being glazed, some new springs to stop them rattling are on order and the material for the renewable sliding faces, to make them easier to open and shut should soon be delivered. The top panels for the exterior doors have been pressed from mild steel by specialists at South Devon Railway Engineering; now we need a few weeks good weather to dry out the doors before we can fit them. Once fitted, they will be labelled, removed and sent to be galvanised before they are finally attached to the carriage.
RG 26/12/2019
1. Bill painting the saloon bulkhead
3. looking towards the kitchen with the first bulkhead in position
4. Kitchen to Bar wall under construction
5. Geoff's door
2. New floor at the Bar end
6. GWR Style droplight guides
| Latest Site Updates |
| News Letters |
| GWR Toad 17410 |
| LNER 70759 24506 |
| LNER 70442 |
| LNER 2013 -2017 OVERHAULS |
| GNR 2701 |
| GWR 1145 |
| General Items |
| GWR Toad 17410 Progress 2016 |
| GWR Toad 17410 Progress 2017 |
| Boston Yard Lift |
| Armchair Member |
| Videos |